15+ Times Our Eyes Were Fooled by Things Pretending to Be Something Else
There are some basic principles to photography that need to be followed even if you’re snapping pics with your phone, if you’re aiming for maximum quality. But besides these technical aspects, usually related to things like exposure, light, or composition, there are also clever DIY hacks that anyone can try to take their photos to the next level.
Now I’ve Seen Everything brings you a few tips and tricks that’ll get you images that look straight out of the portfolio of a professional photographer.
Any well-lit building might help. It’ll brighten up the scene, and you can have the object or person you’re trying to shoot in front of it. Things like a street light or a restaurant with strong night lights might do the trick. Otherwise, you can also try experimenting with light trails (like car lights) when using a longer exposure.
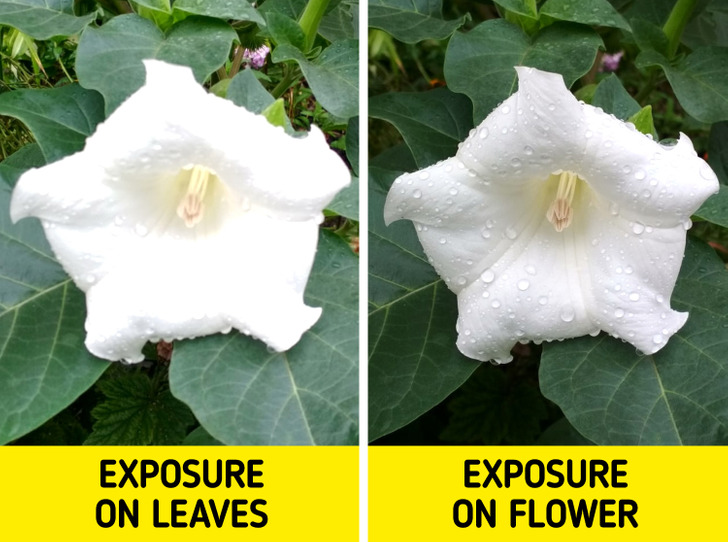
Keep in mind that the camera will set the exposure on the place where you touched the screen with your finger to focus. Thus, if you touched a dark place on the screen with your finger, the camera will measure the exposure at the specified place and brighten the whole image, which can lead to the overexposure of bright areas (like in the left photo). Make sure to touch different parts of the screen with your finger to select the best exposure and get an image without overexposure or excessively dark areas.
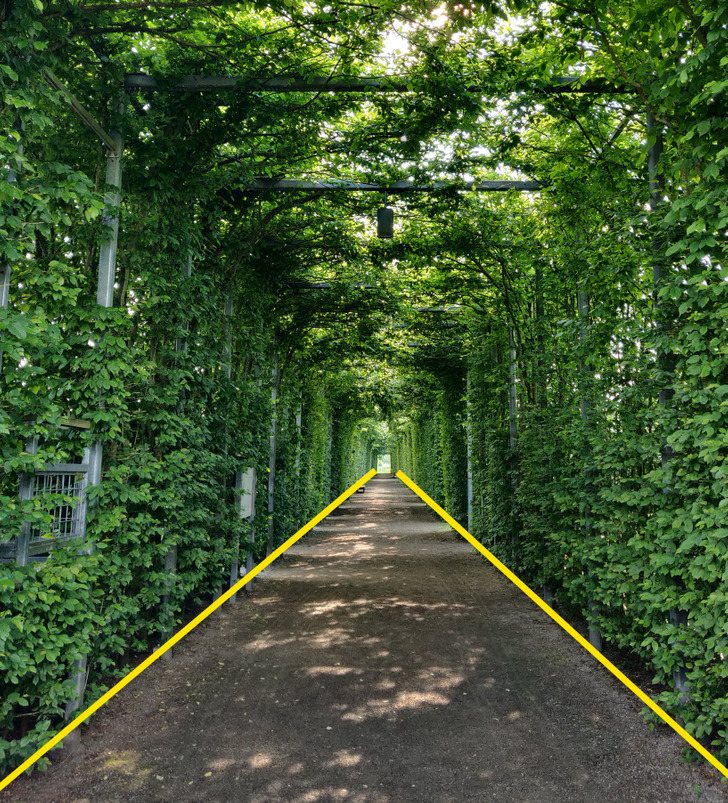
When taking a shot, look for the leading lines. They draw the attention of the viewer to the point of interest in the photo. The main types of lines are:
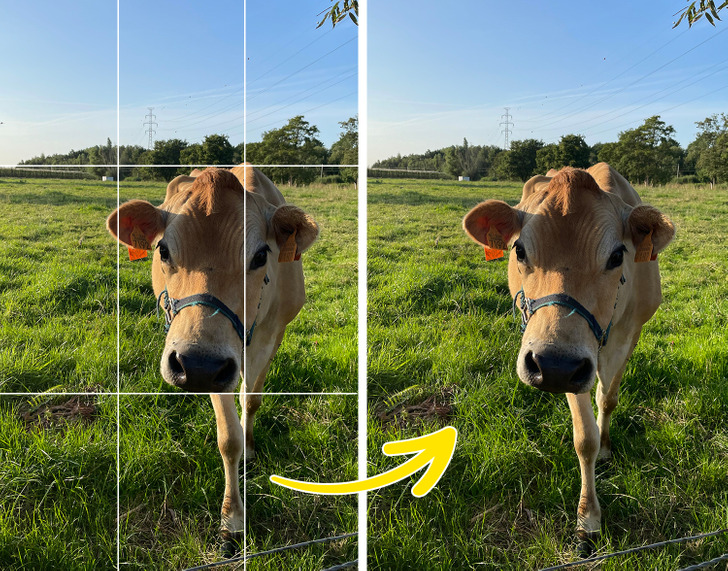
When taking a shot, imagine that the scene is divided into 9 equal parts with the help of vertical and horizontal lines. According to the rule of thirds, the most important elements in the area need to be situated at the intersections where these lines meet. Thanks to this, you can position the supporting elements in the background in a way so they provide more meaning to the main subject in the photo. In your phone’s camera setting, simply enable the grid to help you compose your shots better.
1 and 2. Take a picture frame and remove the glass.
3. Put a book on top of the keyboard of your laptop.
4. Put a piece of black cardboard on the book.
5. Put the glass from the picture frame on top.
6. Place the object you want to take a photo of on top of this construction.
7. Play the background video that suits your theme on the screen.
8 and 9. Choose different background videos depending on the object you want to take the photo of.
1. Let your model hold a picture frame with glass in front of their face. Spray the glass with water.
2. Take photos.
3. You’re doing great!
To take a photo of an object, you’ll need a DIY lightbox.
1. Take a home appliance packaging box and cut off the side flaps that are used for keeping it closed.
2 and 3. Cut out the top and sides of the box, leaving approximately 1-inch rims on each side. The backside and the bottom of the box should remain in place.
4. Attach tissue paper to the rims with paper-backed tape.
5 and 6. Put a piece of filter paper inside the box and secure it.
7. Place table lamps to the right and to the left of the lightbox.
8. Put the object you want to take the photo of inside the lightbox.
9. Switch on the lamp and take the photos.
1. Put your smartphone inside a Ziploc bag.
2 and 3. Paint the spot of the bag against the camera lens with a marker. Half of the circle should be painted red and the other half should be painted blue.
4. Take some photos.
Press and hold the shutter button to take a good photo of a repetitive action. This way, the burst mode starts. After that, choose the best image from the series of photos that were taken.
1. Place a flashlight inside a rectangular grater.
2. Place your face next to the grater and pose to the photographer.
3. You look wonderful!
1. Take a piece of aluminum foil.
2. Crumple it before flattening it out again.
3. Put the foil against the wall.
4. Place the object you want to take a photo of against this backdrop and take a photo.
1. Take a hamburger box. Make a hole in one of its sides that can handle a small flashlight.
2. Place the flashlight inside this hole.
3. Glue a straw to the other side of the box.
4. Press the other end of the straw against the flashlight and switch it on.
5. Illuminate the objects you want to take photos of with one hand, and take photos with the other.
You can see the difference between the photos, both with and without additional lighting, with the naked eye.
When taking a photo of still life, use plates of different colors as reflectors to get the best result possible.
What’s your favorite photo you’ve taken yourself? Do you know any other photography hacks? Share your knowledge in the comments!


